Sometimes a website refuses to load correctly in Google Chrome. The page might show an error. Or the site loads an older version even after a server update. Many times the cause is the DNS cache stored inside the Chrome browser.
Chrome keeps its own DNS records to speed up browsing. This cache stores domain names and their IP addresses so the browser does not request the same information again and again from a DNS server. But if the stored data becomes outdated, Chrome may try to connect to the wrong server.
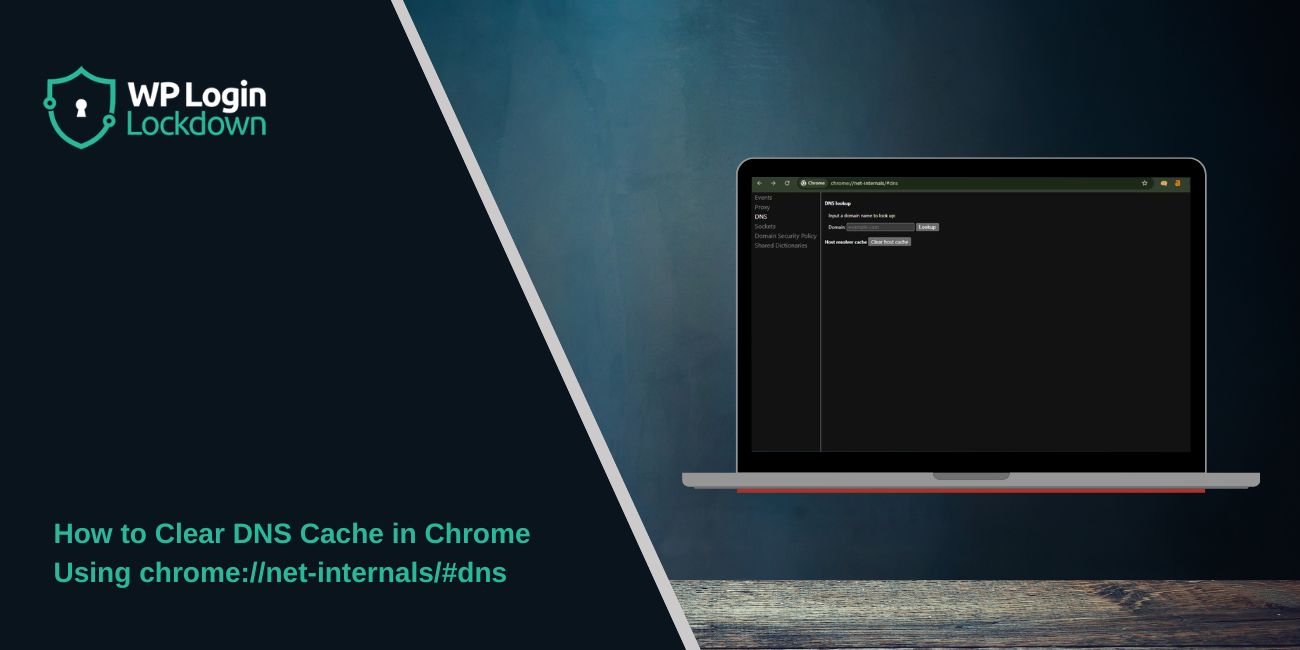
This is where chrome://net-internals/#dns becomes useful. It is a built-in Chrome diagnostics page that allows users to view and clear the browser’s DNS cache entries.
Clearing this cache forces Chrome to request fresh DNS data from the Domain Name System the next time you visit a website.
What is chrome://net-internals/#dns in Google Chrome
 chrome://net-internals/#dns is a special internal page inside the Google Chrome browser. It belongs to a group of diagnostic tools used by Chrome to manage its networking system.
The Chrome networking system handles many tasks. It manages:
- DNS lookups
- network requests
- host resolver cache entries
- connection diagnostics
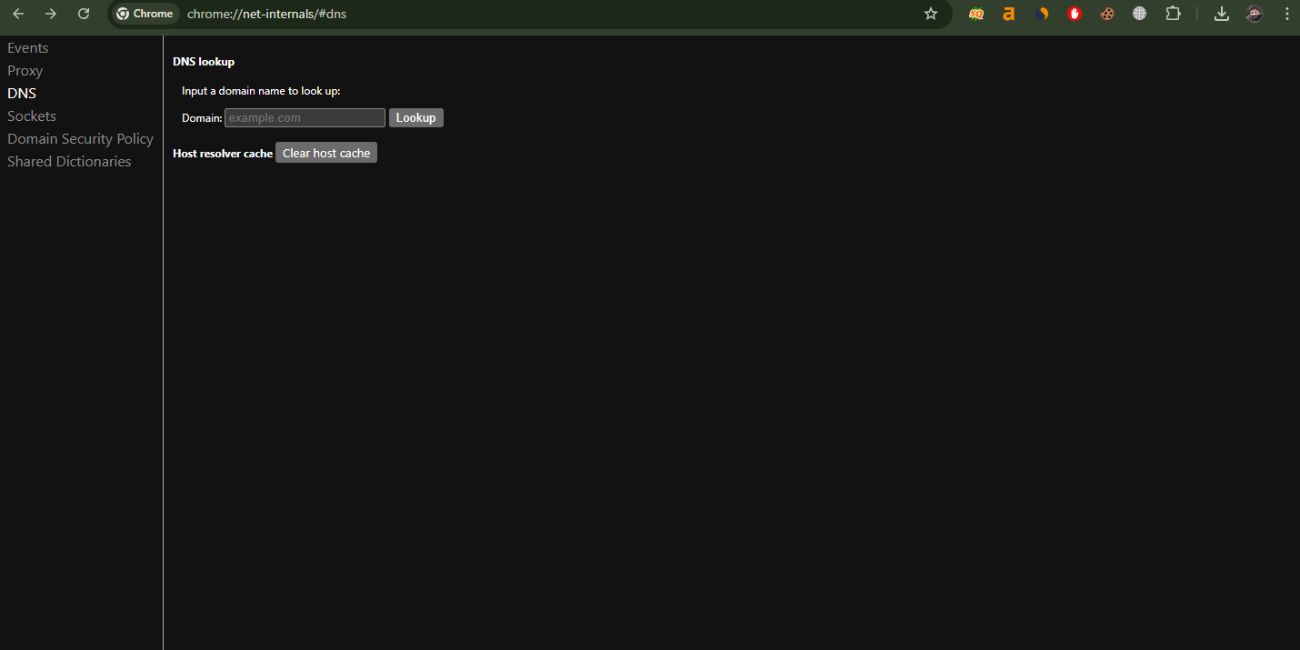
The DNS section of this page focuses on the Host Resolver Cache. This is the part of Chrome that stores recently resolved domain names and IP address mappings.
For example, when you visit a website like example.com, Chrome asks a DNS resolver to translate that domain into an IP address. Chrome may store that result so future visits load faster.
But if the website moves to a different server, the stored record may become outdated. Clearing the DNS cache forces Chrome to perform a new DNS query.
Understanding DNS Cache in Simple Terms
The Domain Name System (DNS) works like the internet’s phone book. Humans type domain names such as google.com, but computers communicate using IP addresses.
When you visit a site, several steps happen:
- Chrome requests the IP address for the domain.
- A DNS server returns the correct IP address.
- Chrome connects to that server to load the website.
To speed up future requests, Chrome stores the result in its DNS cache.
This cache contains several types of information:
- domain name records
- resolved IP addresses
- previous DNS lookups
- host resolver entries
Caching saves time. The browser does not need to contact the DNS server again for the same domain.
Still, cached data sometimes causes issues. When the stored information becomes incorrect, the browser may attempt to connect to the wrong server.
Why You May Need to Clear DNS Cache in Chrome
Several network problems come from outdated DNS records stored in the browser.
Here are common situations where clearing the Chrome DNS cache helps.
- A website recently changed its hosting provider
- DNS records updated but Chrome still uses the old IP address
- The browser shows DNS_PROBE_FINISHED_NXDOMAIN errors
- A developer is testing new DNS configuration for a website
- Chrome loads an outdated version of a webpage
- A domain name resolves incorrectly
For example, a website owner might move a site to a new hosting provider. The domain name now points to a new IP address in the DNS zone records. However, Chrome might still store the previous IP address in its cache.
Until that cache clears, the browser may continue connecting to the wrong server.
Clearing the DNS cache solves this problem because Chrome will request a fresh DNS lookup from the DNS server.
How to Clear DNS Cache Using chrome://net-internals/#dns
Clearing the DNS cache in Chrome is simple. It takes only a few seconds and does not affect bookmarks or browsing history.
Follow these steps carefully.
Step 1
Open the Google Chrome browser on your computer.
Step 2
Click the address bar at the top of the browser window.
Step 3
Type the following address exactly:
chrome://net-internals/#dns
Press Enter.
Step 4
The Chrome networking page will appear. Look for the section called Host resolver cache.
Step 5
Click the button labeled Clear host cache.
Once clicked, Chrome immediately deletes stored DNS entries from its resolver cache.
No restart is required. The change takes effect right away.
How to Confirm the DNS Cache Is Cleared
After clearing the host resolver cache, Chrome removes the stored DNS records for websites visited earlier.
Now the browser must perform a new DNS lookup the next time you open a website.
To confirm the change:
- reload the website that had problems
- close the tab and open the site again
- check if the website now loads correctly
When Chrome reconnects, it sends a fresh DNS request to the configured DNS server, which may belong to your internet service provider, Google Public DNS, or Cloudflare DNS.
If the issue came from outdated DNS data, the website should now load normally.
Chrome DNS Cache vs Browser Cache
Many users confuse DNS cache with browser cache. These two systems store different types of data.
| Feature | DNS Cache | Browser Cache |
|---|---|---|
| Stores | Domain name to IP address mapping | Website images, scripts, and files |
| Purpose | Faster DNS resolution | Faster page loading |
| Location | Chrome networking system | Chrome browsing data storage |
| Clearing Method | chrome://net-internals/#dns | Clear browsing data settings |
For example, the browser cache stores images, CSS files, and JavaScript files from websites. This allows pages to load faster on future visits.
The DNS cache, on the other hand, only stores the IP addresses associated with domain names.
Because they serve different purposes, clearing the browser cache does not clear the DNS cache.
When Clearing Chrome DNS Cache Does Not Fix the Problem
Sometimes the issue does not come from Chrome itself. DNS problems can also occur at other layers of the network.
Several other systems store DNS information:
- the operating system DNS cache
- the router cache
- DNS servers from the internet service provider
- third-party DNS services like Google DNS or Cloudflare
If clearing Chrome’s cache does not solve the issue, you may need to try additional troubleshooting steps.
Possible solutions include:
- flushing DNS cache on Windows using Command Prompt
- clearing DNS cache on macOS using Terminal commands
- restarting the network router
- switching to a different DNS server such as 8.8.8.8 or 1.1.1.1
- restarting the Chrome browser
Developers who manage websites often perform these steps when testing DNS propagation after updating domain records.
Final Thoughts
The page chrome://net-internals/#dns is a simple but useful tool inside the Google Chrome browser. It allows users to manage the browser’s DNS resolver cache and remove outdated DNS entries.
When Chrome stores incorrect domain information, websites may fail to load or connect to the wrong server. Clearing the DNS cache forces the browser to request fresh DNS records from the Domain Name System.
The process takes only a few seconds. Open the net-internals DNS page, click Clear host cache, and reload the website.
Small steps like this often solve common browsing problems related to DNS resolution, server migrations, and network configuration changes.
If this guide helped you fix a Chrome DNS issue, consider sharing it with others who may face the same problem. You can also leave a comment and describe what worked for you.
