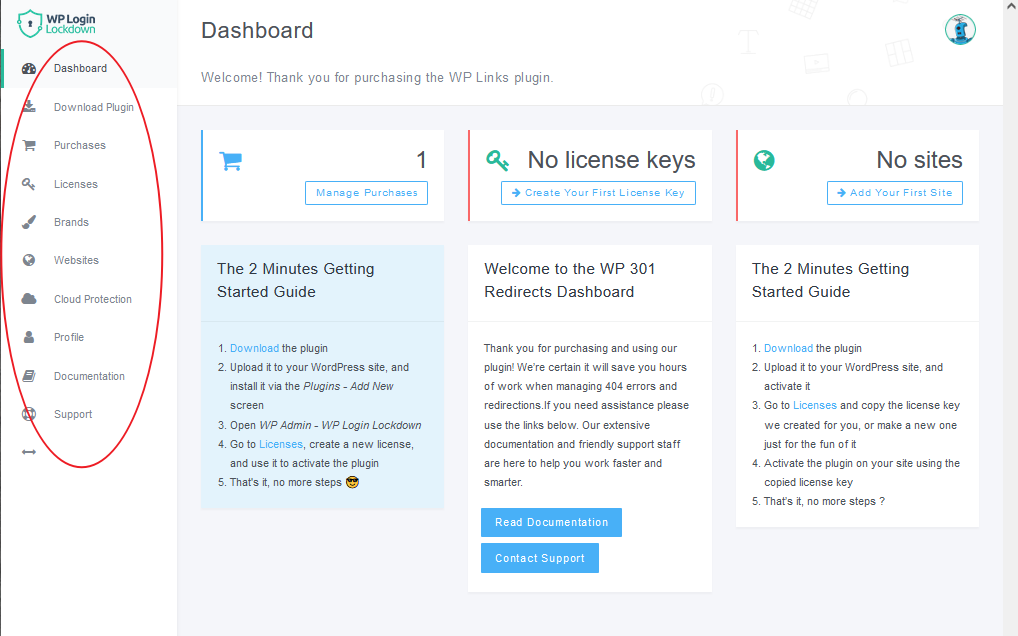
After you login into your Dashboard, you’ll see 10 sub-menus from the left.

- Dashboard – shows a number of purchases, license keys, and sites, it also has a short guide to install the plugin.
- Download Plugin – by clicking on the “Download Plugin”, an automatic download starts, and your plugin is downloaded in a ZIP file.
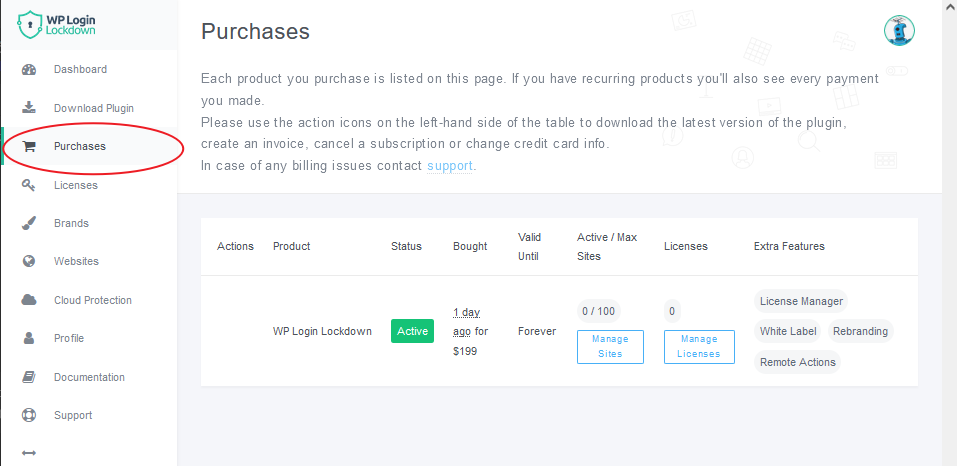
- Purchases – this tab shows a history of your purchases. Actions, Product, Stats, Validity, Active/Max sites stats, Licenses, and Extra Features are noted.

- Licenses – this tab shows all licenses available for the plugin. You can create as many licenses as you need and configure them to fit your needs. Please note that max active sites and the valid-until date limits set in purchases are applied to all licenses. If a license is created with a higher limit, the one from purchase will be applied. Here you can easily add licenses and easily manipulate them via the implemented search bar.
- Brands – this submenu shows your uniquely created brands. You can create new plugin versions with your name, logo, colors, and other elements. Read more about rebranding in the documentation.
- Sites – here you can find all the sites that are using the plugin. Sites will be listed here only if the plugin is installed and activated on the site with your license.
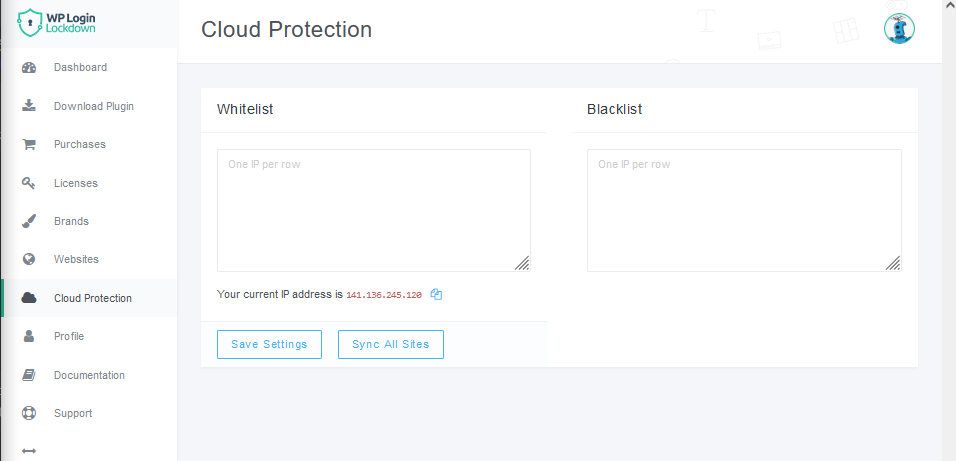
- Cloud Protection – here you can set IPs that are whitelisted or blacklisted (i.e. you can allow or restrict the user’s access to the login page or the whole website). You can find more information here.

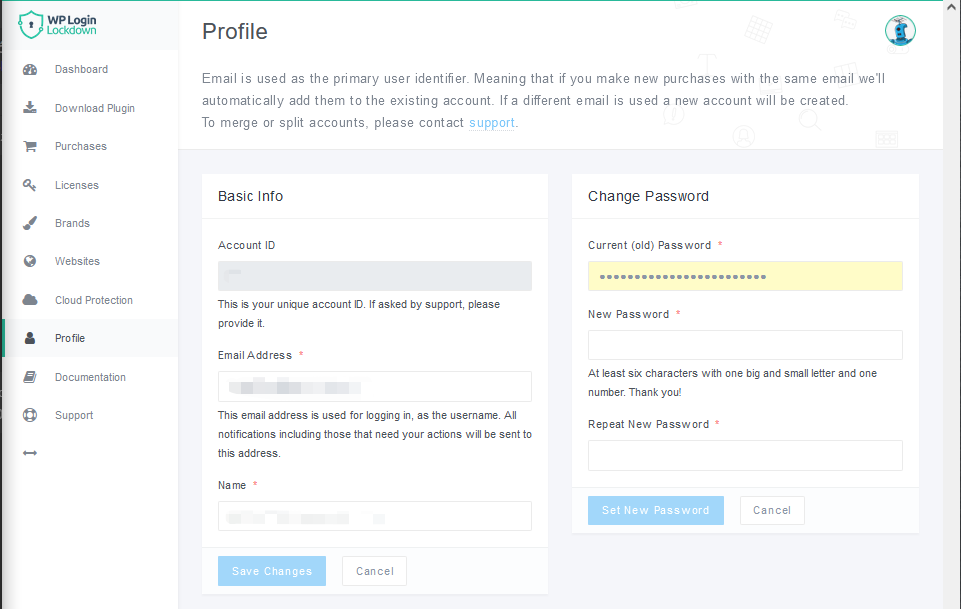
- Profile – this section is used to see and update your profile. You can see your basic info as Account ID, email address, and name. The Profile section is also used to change your password for the Login Lockdown Dashboard.

- Documentation – by clicking on the Documentation tab, the documentation website for the plugin will open in the new tab.
- Support – by clicking on the Support tab the chat will open so that you can send an inquiry and our support team will respond quickly and help you resolve the issue.

